How to Build, Maintain, and Store Your Sourdough Starter
A healthy and vibrant sourdough starter is one of the key elements to creating great bread!
Equipment
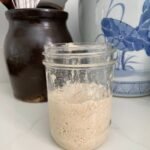
- Container A clear glass or food-grade plastic jar (1 quart) is ideal.Ensure the jar has a loose lid or a cloth cover to allow airflow.
- Scale & Spoon
- A digital kitchen scale ensures accurate measurements.
- Large Spoon Use a non-reactive utensil for stirring.
Ingredients
- Flour Use whole-grain flours such as rye or whole wheat to jump-start fermentation.
- All-purpose flour For ongoing maintenance
- Water Use filtered or dechlorinated water at room temperature, around 75–80 °F, to encourage optimal fermentation.
Instructions
Day 1: The Initial Mix
- Mix Ingredients
- Combine 60 g of whole-grain flour with 60 g of water.
- Stir until the mixture is smooth.
- Resting Period
- Cover the container loosely.
- Let it rest for 24 hours at approximately 75 °F.
Days 2–7: Feeding and Growth
- Twice Daily Feedings
- Discard half of your starter before each feeding.
- Add 60 g of all-purpose flour and 60 g of water.
- Stir thoroughly and cover loosely.
- Watch for Signs of Life
By Days 5–7, your starter should double in size and show abundant bubbles, indicating it’s ready for baking.
- Maintenance & Feeding Ratios
- For a robust sourdough starter, follow these feeding ratios:
- Standard Feed Ratio: 1:1:1 (starter:flour:water by weight) for everyday baking.
- Boosted Feed Ratio: 1:2:2 for accelerating activity in cooler kitchens.
- Float Test: To assess readiness, drop a spoonful of starter in water—it should float when fully aerated.
Notes
Troubleshooting Common Issues
Over time, you might encounter a few challenges. Here are some troubleshooting tips:
- Bubbles But No Rise: Reduce the water content by 10–20% during the next feeding.
- Alcoholic Hooch Formation: Stir hooch back into your starter or pour it off. Increase the frequency of feedings.
- Discoloration or Mold: Discard the affected starter. Clean the jar and utensils thoroughly before starting a new batch.
- Short-Term Storage (Countertop)
- Keep your starter at room temperature.
- Feed it twice daily if baking every day.
- Long-Term Storage (Refrigerator)
- Feed your starter and allow it to peak (approximately 2–4 hours) before refrigerating it in a sealed jar.
- Feed weekly by discarding most of the starter (keeping about 50 g) and refreshing with equal parts flour and water.
- Freezing
- Divide your starter into portions, place in a freezer bag, and freeze for up to 3 months.
- When ready for use, thaw, discard half of the starter, and resume feedings.
- Drying
- Spread the starter thinly on parchment paper and allow it to air-dry completely.
- Store the dried starter in an airtight container.
- Rehydrate with a 1:1 water and flour mix over several days before baking.