Want a reliable sourdough recipe with starter? Most sourdough failures come down to one thing: using a recipe that was written for someone else’s kitchen. This recipe is different — it uses baker’s percentages so the ratios stay consistent no matter your loaf size, and it gives you two schedule options so you can bake around your day rather than the other way around. One bowl. One loaf. Two paths to the same crusty, open-crumbed result.
Sourdough Recipe With Starter — Quick Overview
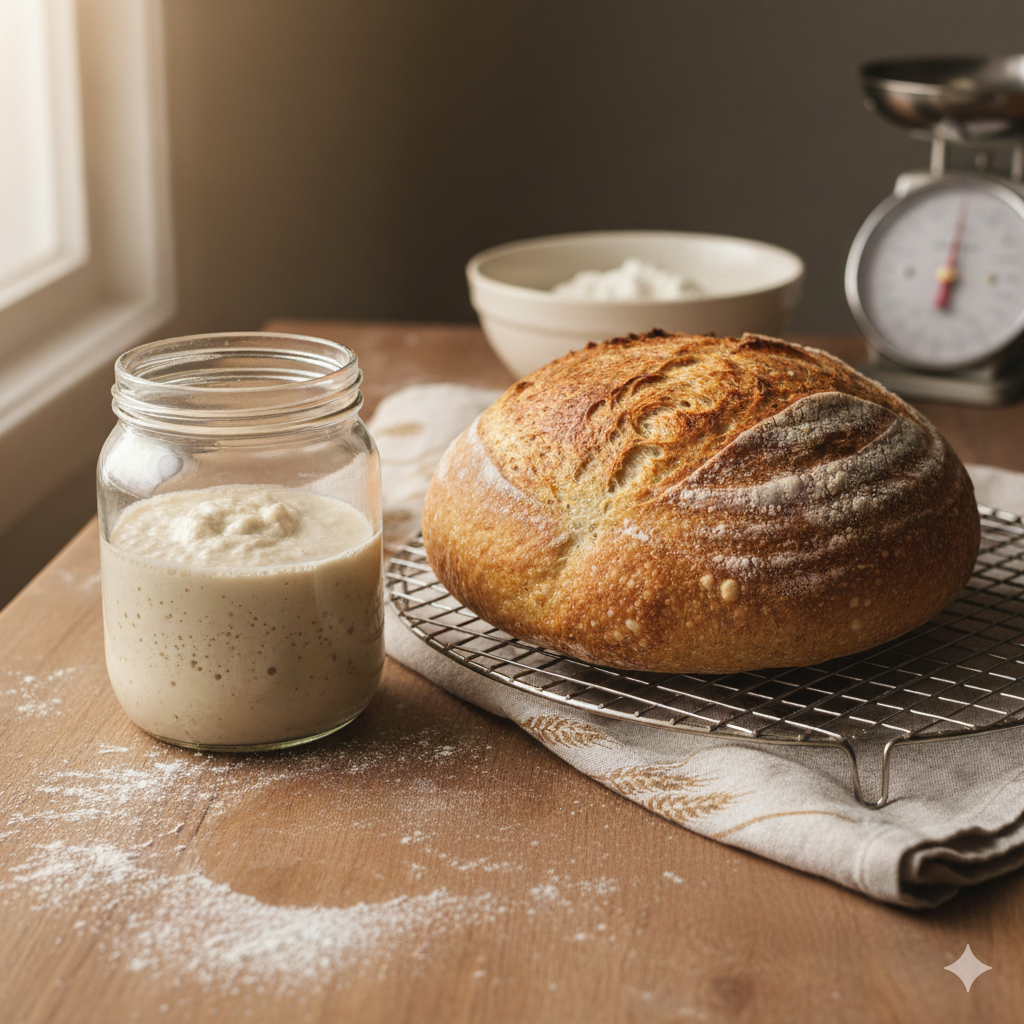
This recipe makes one medium-large boule and uses a 100% hydration active starter (equal parts flour and water by weight). Total hands-on time is about 30 minutes — the rest is waiting and watching. Choose your schedule below based on when you want to eat.
| SCHEDULE | START TO OVEN | BEST FOR |
|---|---|---|
| Same-Day | ~8–10 hours | Baking same day, lighter crumb, mild flavour |
| Overnight Retard | ~18–22 hours | Deeper flavour, easier scoring, fits a work schedule |
Not sure when to feed your starter to hit your target mix time? Use the Starter Feeding Calculator to get exact timing.
How this Sourdough Recipe With Starter Works (timings & hydration)
Count the starter into the total hydration: this recipe sits around ~70% hydration overall. Autolyse boosts gluten development with minimal kneading, stretch-and-folds build structure, and the fridge retard step deepens flavor while slowing fermentation.
Ingredients (makes 1 standard boule / 1 large loaf)
Notes: This recipe assumes your starter is 100% hydration (equal parts flour+water by weight). The starter weight is included in the totals below so the math matches the dough hydration.
- 450 g bread flour
- 50 g whole wheat flour (optional; you can use 500 g bread flour instead)
- 300 g water (room temperature)
- 100 g active sourdough starter (100% hydration — fed, bubbly)
- 10 g fine salt (about 1.75 tsp)
Yields: 1 large loaf (about 800–900 g finished dough).
Scaling this recipe for a different loaf size?
The dough weight calculator adjusts every ingredient automatically – it handles the baker’s math for you.
Method for this sourdough recipe with starter— simple step-by-step
- Feed and check your starter (4–8 hours before or overnight). Use a bubbly, active starter. It should double (or show lots of bubbles) within a few hours after feeding.
- Autolyse (30–60 minutes). In a large bowl, mix the 300 g water with the 500 g total flour (450 g bread flour + 50 g whole wheat if using) until there are no dry patches. Cover and rest 30–60 minutes.
Why: autolyse hydrates flour and helps gluten development. - Add starter + salt (5 minutes). Add 100 g starter and 10 g salt. Mix until incorporated — squeeze and fold the dough until homogeneous. Cover.
- Bulk Fermentation with Stretch-and-Folds (2–5 hours)
- During the first 1.5–2 hours, perform 4 sets of stretch-and-folds every 20–30 minutes. To stretch-and-fold: wet your hands, grab one side of the dough, stretch it upward, and fold it over the centre. Rotate the bowl 90° and repeat 4 times per set.
- After your last fold, leave the dough undisturbed. Bulk fermentation is done when the dough has grown 50–75%, has visible bubbles on the sides and surface, and jiggles like jello when you shake the bowl. Do not go by time alone — watch the dough.
- Not sure how long your bulk will take? Use the Fermentation Matrix to get a personalised window based on your kitchen temperature and starter strength.
- Choose your schedule after bulk:
- Option A — Same Day: After a full bulk (3–4 hours at ~75°F), shape, then do a final proof at room temperature for 1–2 hours until the dough looks puffy and springs back slowly when poked. Bake as directed in Step 7.
- Option B — Overnight Retard (recommended for flavour): After 1.5–2 hours of stretch-and-folds, shape lightly and transfer to a floured banneton. Cover and refrigerate overnight for 8–16 hours. Bake straight from the fridge the next day — no warming needed.
- Shape: Turn dough onto a lightly floured surface, pre-shape into a round, rest 15–20 minutes, then final shape into a tight boule. Place seam-side up in a floured banneton (or bowl lined with linen).
- Final proof: Room temp 1–2 hours until puffy (Option A) or fridge 8–16 hours (Option B).
- Preheat oven + bake: Preheat oven to 475°F (245°C) with a Dutch oven inside for at least 45 minutes. Score the loaf, transfer dough seam-side down into hot Dutch oven, cover, bake 20 minutes covered, then reduce to 450°F (230°C) and bake 20–25 minutes uncovered until deep brown and hollow-sounding. Internal temp ~205–210°F when done.
- Cool: Let cool at least 1 hour before slicing to finish crumb set.
Troubleshooting
Dense or gummy crumb
Almost always a fermentation issue — either bulk fermentation ended too early, or your starter wasn’t at peak when you mixed. If the crumb is dense with large irregular holes at the top and tight crumb at the bottom, that is under-fermentation. If it’s gummy throughout, it’s usually under-baking or slicing too early. Full guide: Why Is My Sourdough Dense?
Flat loaf that spread sideways
Over-proofing is the most common cause — the dough loses structure and can’t hold its shape going into the oven. Next time, reduce the final proof time, make sure your shaping is tight, and bake a little earlier. You can also try scoring at a shallower angle (15–20°) rather than straight down. Full guide: Why Did My Sourdough Spread Sideways?
No oven spring — loaf barely rose
Check three things in order: (1) Was your starter genuinely at peak — bubbly, domed, doubled? (2) Did the dough bulk ferment long enough? (3) Was your Dutch oven fully preheated for at least 45 minutes? All three need to be right. Full guide: Sourdough Not Rising in the Oven
Starter not bubbling or doubling
Feed your starter 2–3 more times before baking — once a day if kept at room temperature, or skip the fridge until it’s reliably doubling within 4–8 hours. A starter that takes more than 10–12 hours to double at 72°F needs more frequent feedings to strengthen it. Full guide: Sourdough Starter Not Rising
Too sour — or not sour enough
More sourness: longer cold proof (up to 16–18 hours in the fridge), or let your starter ferment slightly past peak before adding it to the dough. Less sourness: shorten the retard, use the same-day schedule, or feed your starter 1–2 hours before peak to catch it earlier. Full guide: Getting Tangier or Milder Sourdough
Dough is too sticky to handle
Wet hands are your best tool — never add more flour during bulk or shaping. If the dough is extremely sticky throughout, it may be slightly over-hydrated for your flour brand, or bulk fermentation went too long and the gluten has broken down. Try reducing hydration by 3–5% on your next bake. Full guide: Sourdough Too Sticky
Easy Sourdough Recipe With Starter — No-Fail Everyday Loaf
Equipment
- 1 Banneton
- 1 Dutch Oven
Ingredients
- 450 g bread flour
- 50 g whole wheat flour optional; you can use 500 g bread flour instead
- 300 g water room temperature
- 100 g active sourdough starter 100% hydration — fed, bubbly
- 10 g fine salt about 1.75 tsp
Instructions
- Feed and check your starter (4–8 hours before or overnight). Use a bubbly, active starter. It should double (or show lots of bubbles) within a few hours after feeding.
- Autolyse (30–60 minutes). In a large bowl, mix the 300 g water with the 500 g total flour (450 g bread flour + 50 g whole wheat if using) until there are no dry patches. Cover and rest 30–60 minutes.
- Why: autolyse hydrates flour and helps gluten development.
- Add starter + salt (5 minutes). Add 100 g starter and 10 g salt. Mix until incorporated — squeeze and fold the dough until homogeneous. Cover.
- Bulk fermentation with stretch-and-folds (2–4 hours at ~75°F / adjust for temp).
- Do 4 sets of stretch-and-folds every 20–30 minutes during the first 1.5–2 hours. To stretch-and-fold: wet hands, lift one side and fold over; rotate bowl and repeat 4×.
- After the last fold, let dough rest undisturbed until it has increased by ~20–40% and shows bubbles at the surface. (Warmer temps shorten time; cooler temps lengthen it.)
- Option A — Same day schedule: Bulk ferment ~3–4 hours total, then shape and final proof 1–2 hours (or until ~80% rise), bake.
- Option B — Overnight retard (recommended for flavor): After initial bulk and folds (1.5–2 hours), shape lightly and place in a floured banneton, cover, and refrigerate overnight (8–16 hours). Bake next day from cold.
- Shape: Turn dough onto a lightly floured surface, pre-shape into a round, rest 15–20 minutes, then final shape into a tight boule. Place seam-side up in a floured banneton (or bowl lined with linen).
- Final proof: Room temp 1–2 hours until puffy (Option A) or fridge 8–16 hours (Option B).
- Preheat oven + bake: Preheat oven to 475°F (245°C) with a Dutch oven inside for at least 45 minutes. Score the loaf, transfer dough seam-side down into hot Dutch oven, cover, bake 20 minutes covered, then reduce to 450°F (230°C) and bake 20–25 minutes uncovered until deep brown and hollow-sounding. Internal temp ~205–210°F when done.
- Cool: Let cool at least 1 hour before slicing to finish crumb set.
Notes
Troubleshooting & quick fixes
- Starter not bubbly? Feed 2–3 times or wait until it doubles before using.
- Too dense crumb? Try longer bulk fermentation (warm place), gentler shaping, or slightly higher hydration.
- Flat loaf after scoring? You may have overproofed — shorter final proof next time.
- Too sour? Shorten retard time or bake sooner after final proof.
Frequency Asked Questions:
Do I need to make a starter first?
This recipe is for people who already have an active starter. If you are building one from scratch, it takes 5–7 days before it is strong enough to leaven bread. Head to the complete sourdough starter guide to get started.
Can I use a starter straight from the fridge?
Not without feeding it first. A refrigerated starter is dormant — it needs at least one feed and 4–8 hours at room temperature to become active again before it is ready to use. If your starter has been in the fridge for more than a week, do two feeds on consecutive days before baking to fully reactivate it.
What is a 100% hydration starter?
A starter fed with equal weights of flour and water — for example, 50g of each. Often referred to as 1:1:1. This is the most common type for home bakers. If your starter is stiffer or more liquid than this, the hydration in this recipe will need a small adjustment to compensate. The hydration calculator can help you work out the adjusted water amount.
Can I skip the autolyse?
Yes — autolyse is optional. It helps gluten develop without extra kneading, which is useful at higher hydrations. If you skip it, add the starter and salt at the same time as the flour and water, then do an extra set of stretch-and-folds during bulk. The final loaf will be similar, though the dough may feel slightly less extensible during shaping.
How do I know when bulk fermentation is finished?
Time is a guide, not the answer. Your dough is ready to shape when it has grown 50–75%, jiggles like jello when the bowl is shaken, has visible bubbles on the surface and sides, and springs back slowly and halfway when you poke it with a wet finger. Use the Fermentation Matrix to get a time window based on your actual kitchen temperature.
Can I make this recipe without a Dutch oven?
A Dutch oven is strongly recommended — it traps steam during the first 20 minutes of baking, which is what allows oven spring and a good crust. Without it, you can mimic steam by placing a metal pan of boiling water on the bottom oven rack and baking the loaf on a preheated baking stone or heavy sheet pan. Results will vary but it is workable.
Why did my loaf turn out dense?
The most common reasons are: starter not at peak, bulk fermentation cut short, or dough shaped too tightly which degassed it. Read the full breakdown at Why Is My Sourdough Dense?