Learn the proofing test to know when your sourdough is done proofing. Discover how temperature, time, and the poke test help you avoid underproofed or overproofed loaves for the best results.
Learn the Proofing Test for Perfect Sourdough
Learning the proofing test is one of the best ways to know when your sourdough is ready to bake. Instead of guessing by time alone, you can use simple visual and tactile checks—like the poke test and jiggle test—to avoid underproofed or overproofed loaves. Mastering this stage ensures your bread bakes with an open crumb, rich flavor, and great oven spring.
What Is Proofing?
Proofing is the final rise that happens after you’ve shaped your dough. During this stage, the wild yeast and bacteria continue working:
- Gas retention from yeast creates volume.
- Flavor development deepens as acids form.
- Structure improves as gluten relaxes.
Don’t confuse proofing with bulk fermentation. Bulk fermentation is the first rise (often 4–8 hours), while proofing is the crucial last step before baking.
How Long Should Sourdough Proof?
Proofing times vary depending on your environment and ingredients:
- Temperature: Warm kitchens proof faster (1–3 hours). Cooler rooms or fridge proofing can take 8–24 hours.
- Starter activity: A strong, active starter means faster proofing.
- Flour type: Whole grain ferments faster than white flour.
General guidelines:
- Room temperature: 2–4 hours.
- Cold proofing (fridge): 8–24 hours.
The Proofing Test — How to Tell When It’s Done
Since clocks aren’t always reliable, bakers use the proofing test to check readiness. Here are the main signs:
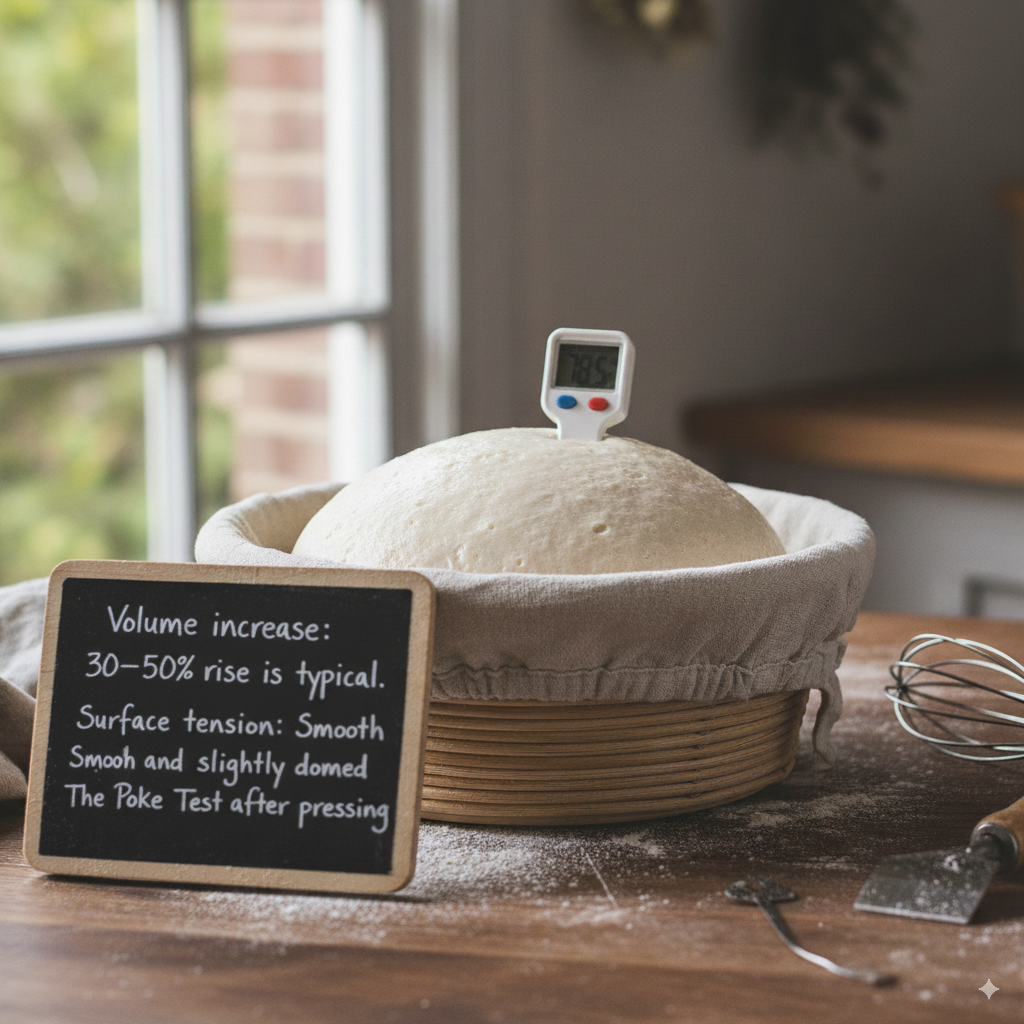
- Volume increase: Dough should expand by 30–50%, not double.
- Surface tension: Smooth and slightly domed.
- The Poke Test: Gently press a floured finger into the dough.
- Springs back slowly and leaves a slight dent → perfectly proofed.
- Springs back immediately → underproofed.
- Doesn’t spring back → overproofed.
- The Jiggle Test: Shake the basket—properly proofed dough wobbles like a water balloon.
Using these simple proofing tests will give you more accuracy than relying on timing alone.
Tips for Perfect Proofing
- Use a proofing basket (banneton) to support the dough’s shape.
- Control temperature with a proofing box or even your oven light.
- Be consistent with your starter feeding schedule.
- Keep notes—proofing is equal parts science and art.
FAQ
How do you know when sourdough is done proofing?
Your dough is proofed when it passes the poke test — the indentation springs back slowly and leaves a small dent.
Can you overproof sourdough overnight?
Yes. Long proofing, especially at warm temperatures, can cause overproofing. Cold fridge proofing slows fermentation, making overnight proofing safer.
What happens if I bake underproofed dough?
The bread will be dense, with poor oven spring and tight crumb. It may taste fine, but it won’t have the open texture of well-proofed bread.
Final Thoughts on Proofing
Proofing is more than just waiting—it’s the moment where all your careful mixing, folding, and shaping finally come together. A good proof gives your sourdough the balance of strength and airiness it needs to bake into something truly special.
The key is to avoid relying on the clock alone. Instead, use a combination of temperature awareness, dough behavior, and the proofing test. Whether it’s the poke test or the jiggle test, these simple checks let you read your dough’s signals with confidence. Over time, you’ll start to recognize the subtle signs of readiness: a gentle wobble, a smooth dome, and a soft but elastic surface.
Getting the proofing stage right pays off in the oven. Your loaf will spring upward, develop a blistered crust, and reveal an open crumb that’s both chewy and tender. And if you miss the mark occasionally—don’t worry. Every bake teaches you something new, and practicing the proofing test will make you a more intuitive baker.
So next time you bake, trust your senses more than the timer. Watch, poke, jiggle, and learn. Proofing is part science, part art, and mastering it will transform not only your bread but also your confidence in the kitchen.
Ready to put it into practice? Try one of our favorite [Sourdough Recipes] and use the proofing test to guide you to your best loaf yet.
Pingback: Sourdough Hydration — How to Get It Right Every Time - sourdoughsavvy.com