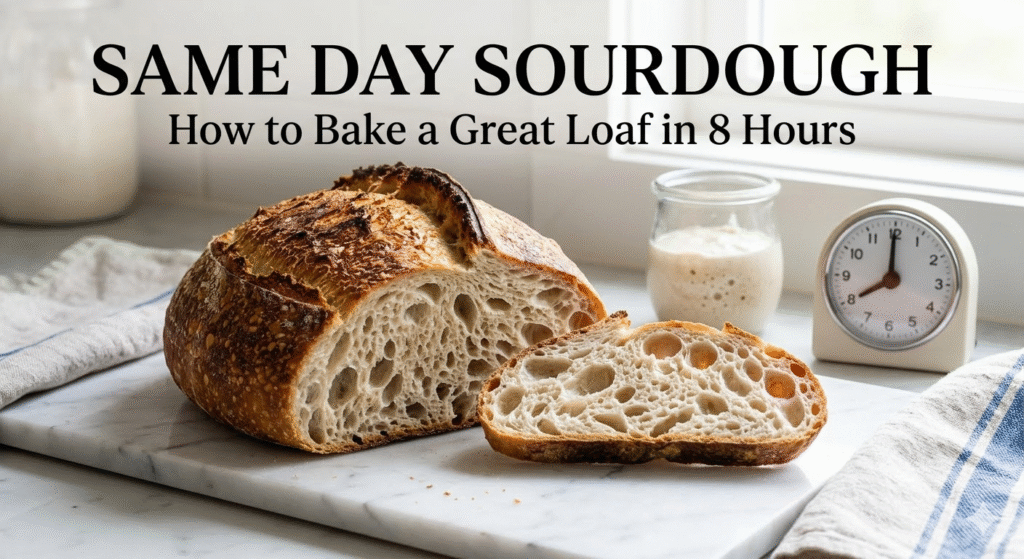
Same Day Sourdough:
How to Bake a Great Loaf in 8 Hours
Mix in the morning, eat by evening. Here’s the exact schedule, the technique adjustments that make it work, and what to honestly expect from a faster loaf.
What You’re Working Around — And How
Traditional sourdough takes time for two reasons: flavour development and gluten development. Long fermentation gives wild yeast and bacteria more time to produce the acids and compounds that make sourdough taste complex. Long cold proofing gives the gluten structure time to relax and develop fully.
When you compress the timeline, you’re making tradeoffs in both areas. The goal of same-day sourdough isn’t to pretend those tradeoffs don’t exist — it’s to minimise them intelligently so you end up with a loaf that’s genuinely worth eating, even if it won’t match a 36-hour slow ferment.
The two key adjustments that make it work are a warmer bulk fermentation (78–82°F rather than the usual 72–75°F) and lower hydration (69% rather than 72–75%). Warmth accelerates fermentation enough to complete bulk in 2.5–3.5 hours. Lower hydration gives you a dough that holds its shape without the extended cold proof that would otherwise firm it up.
Ingredients for One Loaf
- 450g bread flour — high protein (12%+) is important; don’t substitute all-purpose
- 310g warm water at 78–80°F — this is 69% hydration
- 90g active starter — at or just past peak, visibly bubbly
- 9g fine sea salt
The 8-Hour Schedule
Feed your starter at a 1:1:1 ratio (equal parts starter, flour, and water by weight) and place it somewhere warm — 78–80°F is ideal. At this temperature, an active, well-maintained starter should double and peak within 2–3 hours.
Boosted option: Feed at a 1:0.5:0.5 ratio (more starter relative to fresh flour) to accelerate activity. This gives you a faster-peaking starter — worth it when you’re working against the clock, though the flavour contribution will be slightly less complex.
When your starter shows a good dome — typically 2 hours after feeding — it’s time to mix. Combine the 450g flour with 280g of the water (hold back 30g). Stir until no dry flour remains. Cover and rest for 30 minutes.
This autolyse period develops gluten passively while your starter finishes peaking. Don’t skip it — that 30-minute rest does significant work for free and is one of the easiest ways to improve same-day dough quality.
After 30 minutes, add your active starter and the remaining 30g of water. Mix until fully incorporated. Add salt and mix again.
This is where same-day sourdough differs most from a traditional schedule. Instead of a long, cool bulk fermentation, you’re doing a shorter, warmer one at 78–82°F throughout.
During the first 1.5 hours, perform 4 sets of stretch and folds spaced 20–30 minutes apart. Wet your hand, grab the bottom of the dough, stretch up as far as it will go without tearing, fold over the top. Rotate 90° and repeat 3 more times. That’s one set.
When is bulk done? In a warm environment with an active starter, this dough should complete bulk in 2.5–3.5 hours. Look for:
- 50–75% increase in volume
- Bubbles visible on the sides and surface
- Dough that looks airy and jiggles slightly when you shake the bowl
- A domed, slightly convex surface
Turn the dough out onto a lightly floured surface. Using a bench scraper, fold the edges in toward the centre and flip the dough so the seam is down. Use the scraper to drag it toward you a few times to build surface tension. Cover with a towel or inverted bowl and rest for 20–30 minutes.
This bench rest relaxes the gluten enough for a clean final shape. Don’t skip it or rush it — tight gluten immediately after bulk will tear during final shaping.
Shape the dough into a boule (round) or batard (oval), focusing on building a tight, taut surface. For a boule: fold the edges in toward the centre, flip seam-side down, and use your hands to drag it toward you while tucking the bottom under. The surface should feel firm and spring back gently when pressed.
Transfer seam-side up into a well-floured banneton or a bowl lined with a well-floured tea towel. Dust generously with rice flour to prevent sticking — regular flour absorbs into the wet surface and won’t release cleanly.
Without an overnight cold proof, you need to be careful not to over-proof. A warm proof moves fast and can go from perfect to over-proofed in 30 minutes.
Option A — Room temperature proof (faster, requires attention): Leave shaped dough at 72–75°F for 1.5–2 hours. Check with the poke test: poke with a floured finger — it should spring back slowly and incompletely. That’s your baking window. Preheat the Dutch oven while you wait.
Option B — Short cold proof (recommended): After 30–45 minutes at room temperature, move to the fridge for 1–2 hours. Baking from cold gives you better structure, makes scoring easier, and produces a better crust. This is the better option if you can time it.
Preheat your oven to 500°F / 260°C with the Dutch oven inside. Give it a full 45–60 minutes to heat through — this is non-negotiable for same-day sourdough, where the thermal mass of a fully preheated Dutch oven provides the oven spring advantage you don’t get from a long, cold-developed dough.
Turn the cold dough out onto parchment paper. Score quickly and confidently with a sharp lame or razor blade.
- Covered at 500°F for 20 minutes — steam phase; the loaf rises and the crust forms
- Uncovered at 460°F for 20–25 minutes — develops colour and drives off moisture
- Pull when internal temperature reaches 205–210°F / 96–99°C
What to Expect: Same-Day vs. Traditional Sourdough
It’s worth being clear about what changes and what stays the same.
| Same-Day (8 hours) | Traditional (24–36 hours) | |
|---|---|---|
| Flavour | Mild, wheaty, lightly tangy | Complex, deeply sour, more developed |
| Crumb | Good — slightly tighter | Better — more open |
| Crust | Good | Slightly more developed |
| Digestibility | Good | Better — more phytate breakdown |
| Difficulty | More demanding of timing | More forgiving of imperfection |
| Best use | Weekday baking, toast, sandwiches | Weekend baking, flavour priority |
Same-day sourdough tastes like excellent homemade bread. It doesn’t taste like a 36-hour slow ferment — and that’s fine. For weekday baking and everyday eating it’s more than good enough. Save the long ferment for weekends when flavour is the priority.
Tips for Better Same-Day Results
Use Bread Flour, Not All-Purpose
The higher protein content builds gluten faster, which matters significantly when you don’t have time for extended development. All-purpose flour at 69% hydration on a same-day schedule produces a dough that’s noticeably harder to manage.
Keep Everything Warm Throughout
Cold water, cold bowls, and cold counters all slow fermentation. Use warm water at 80°F, warm your bowl with hot tap water before adding dough, and keep the dough in a warm spot throughout bulk. Every degree of temperature drop adds time you don’t have.
A Slightly Over-Ripe Starter Helps Flavour
For a same-day loaf, using a starter that is just past its dome — beginning to recede slightly — rather than at maximum rise contributes more acid to the dough and gives the finished loaf more tang than a freshly-peaked starter would.
Can I Add Commercial Yeast?
Yes — a small addition (⅛ teaspoon of instant yeast) will accelerate fermentation and give you a more reliable rise in a short window. The tradeoff is flavour: commercial yeast produces gas but not the acids that give sourdough its character. The result will taste closer to a very good white sandwich bread than a classic sourdough. Use it as a practical tool for reliable results when your starter isn’t at full strength, not as a regular shortcut.
The Same-Day Cheatsheet
- 7:00 AM — Feed starter 1:1:1, warm spot (78–80°F)
- 9:00 AM — Mix flour + 280g water, autolyse 30 minutes
- 9:30 AM — Add active starter, remaining 30g water, salt. Begin bulk
- 9:30–12:30 PM — Warm bulk at 78–82°F, 4 stretch and fold sets
- 12:30 PM — Pre-shape, bench rest 20–30 minutes
- 1:00 PM — Final shape, into banneton
- 1:00–3:30 PM — 30–45 min room temp, then fridge 1–2 hours (Option B)
- 3:30 PM — Preheat Dutch oven at 500°F for 45–60 minutes
- 4:15 PM — Score and bake: 20 min covered, 20–25 min uncovered at 460°F
- ~5:00 PM — Cool on wire rack, minimum 1.5–2 hours before slicing
- ~7:00 PM — Slice and eat
Readiness Checklist
Troubleshooting
Pick your problem and get the fix before your next bake.
Same-day sourdough is less forgiving of a sluggish starter than a long cold-proof loaf. Your starter must double within 2–3 hours of feeding at 78–80°F. If it takes 6+ hours to peak, it’s not strong enough — do a week of twice-daily feedings before trying again. Also check that bulk reached 50–75% rise before you shaped: an under-fermented same-day dough has nowhere near enough gas to spring in the oven.
Back to the schedule ›Same-day sourdough is particularly important to cool fully before slicing — a short fermentation leaves more residual moisture in the crumb that needs at least 1.5–2 hours to set. If you waited long enough, the gumminess points to under-fermented dough: bulk didn’t reach 50–75% rise before shaping, so the crumb structure never fully developed.
Tips for better results ›This is exactly why same-day sourdough uses 69% hydration rather than the 72–75% you’d use for an overnight loaf. Without an extended cold proof to firm the dough, higher hydration is very hard to shape. Reduce water to 310g and try again. If the dough is warm from a hot bulk environment, refrigerate for 20–30 minutes before shaping — cold firms it dramatically.
Full sticky dough guide ›Without a cold proof to firm the loaf, the final proof window is narrow — it can go from perfect to over-proofed in 30 minutes at room temperature. Use Option B (short cold proof): after 30–45 minutes at room temperature, move the shaped dough to the fridge for 1–2 hours. Baking from cold gives you better structure going into the oven. Also focus on building tighter shaping tension — drag the boule firmly across the bench to tighten the surface skin.
Final proof options ›Preheat your oven at 500°F with the Dutch oven inside for a full 45–60 minutes — this is non-negotiable for same-day sourdough where every advantage matters. After removing the lid at 20 minutes, the uncovered phase at 460°F develops colour. If still pale after 25 minutes uncovered, raise to 475°F or leave for an additional 5 minutes. Check your oven runs true with an oven thermometer — many run 10–20°F cool.
A same-day loaf will never have the tangy complexity of a 36-hour cold ferment. The acids that create sourdough’s distinctive flavour take time to develop. To maximise flavour on a same-day schedule: use a riper starter (just past peak, slightly receding) rather than one at maximum dome, and make sure bulk fermentation goes the full duration rather than being cut short. If flavour depth is the priority, the overnight method will always win.
Frequently Asked Questions
The Bottom Line
Same-day sourdough is a genuine skill worth developing — not a compromise version of the real thing, but a different approach with its own logic and rewards. A fresh same-day loaf pulled from the oven on a weekday evening is one of the better things you can make in a home kitchen.
The method rewards attention during bulk more than any other step. Watch the dough, not the clock. Everything else follows from getting that right.
-
RecipeOvernight Sourdough Bread — Cold Ferment Method
-
RecipeEasy Sourdough Recipe With Starter
-
TroubleshootingSourdough Too Sticky? Here’s How to Fix It
-
TroubleshootingSourdough Not Rising in the Oven?
-
GuideHow to Build and Maintain a Sourdough Starter
-
ToolFull Sourdough Troubleshooting Engine